Cool Photography Tips to Try on Your Next Trip
One of the best things about travelling is being able to capture moments and memories and revisit them later. Whether it’s a breathtaking view, a candid moment or a well-coordinated dive into a swimming pool, the photographs you take on any trip will always be treasured for life. Not to mention, they’re great for flaunting your journeys on social media and inspiring others to do the same.
On this Camera Day – celebrated on June 29th – we help you #DiscoverMore about the art of photography. But first, let’s start by getting acquainted with a few commonly used photography terms.
- Aperture: It’s the size of the camera lens opening. Think of the lens as a room and the aperture, the door; if the door is wide open, it lets in more light. Similarly, a larger aperture allows more light into the lens, making images brighter, while a smaller aperture lets in less light. The size of the aperture is measured in f-numbers – f/4, f/22.
- Shutter speed: It’s the speed at which the camera opens and closes to allow light in and capture the image; the longer the shutter stays open, the more light it lets in. If the subject is moving, the image could be blurry. However, faster shutter speed can capture a freeze motion, giving you a clearer picture. Shutter speed is measured in fractions of a second – 1/500, 1/1000 etc.
- ISO: This determines the camera’s sensitivity to light. For instance, ISO 100 implies it is not very sensitive to light and is ideal for shooting during the day. While ISO 3200 is highly sensitive to light and such a value is good for lowlight situations.
- Focus: When you stare at an object that is close to you, it appears clear, and the other objects around it become hazy. Similarly, in photography, focus refers to the sharpness of the image; the object in-focus is sharp, and those out-of-focus are blurred.
A lot of smartphones allow you to manually control most of these settings and allow you to take images just like you would with a professional or DSLR camera.
Now that you know a few basic photography terms, here are a few techniques that will give you those Insta-worthy clicks.
Apply the Rule of Thirds
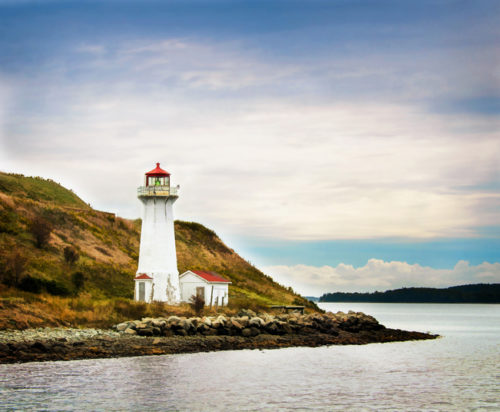
Have you ever looked at two pictures of the same thing, say a monument, and while one photo instantly grabbed your attention, the other didn’t? It’s probably because of the ratios! The rule of thirds is a type of image composition where a photograph is divided evenly into thirds – horizontally and vertically – and the subject of the image is placed at the intersection of these dividing lines. This makes for a sharp and balanced picture, where the subject stands out yet blends in with the background in the right proportion.
Tip – While on a road trip, park your Ford against a scenic background and follow the rule of thirds to get a stunning click. And use the grid for better composition.
Master Freeze Motion
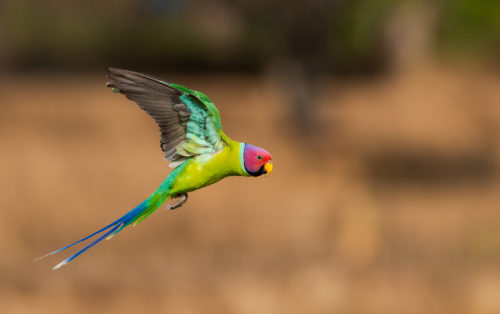
Being able to capture moving or flowing objects such as a dance performer or a waterfall without ending up with blurred photographs is a skill. Taking such pictures does require some practice, but it’s no rocket science! You just need to get the techniques right. Use the manual mode, select the correct focus mode, increase your ISO, use fast shutter speed and a wide aperture. Note that the settings you choose will depend on the speed of the subject and the lighting.
Tip – If you want to take several continuous shots, for instance of a person cliff driving, put your camera on burst mode.
Capture Light Trails
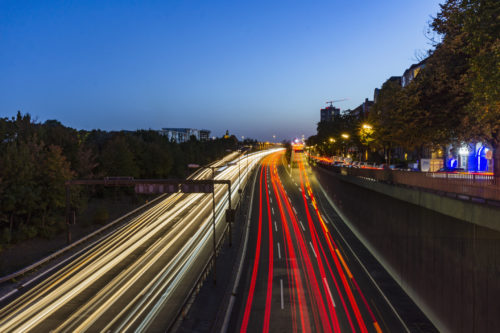
Have you ever seen photos of city roads at night with light streaks? These are called light trail images or long exposure shots, and it is the best way to add a wow factor to your nighttime photography. It is all about capturing the luminous light with extended shutter speed. To ace such pictures, choose a low ISO, depending on the light.
The shutter speed needs to be about 10 to 30 seconds and set the aperture anywhere between f/8 to f/16, depending on how much exposure you want. You can click such images while driving over a bridge or tunnel; you don’t even have to step out of your car. When you click from inside your vehicle, the juxtaposition of the moving background and a still foreground will create an illusion of movement in the photograph.
Tip – To avoid unsteady hands from ruining the image, set your camera on a tripod while taking light trails. It will maintain the sharpness of light.
Optimise on Shadows
Photography may be all about light, but darkness is an equally powerful component. Shadow photography allows you to add a sense of contrast or balance to your photograph depending on whether you choose to make the shadow the focal point or a subtle detail. For instance, when visiting a monument with striking architecture, capturing its shadow at dusk can make for a captivating image.
Tip – Make your night photography dramatic by capturing shadows under the streetlight. If it has just rained, enhance the dept in your images by looking for shadows in puddles.
Focus on Silhouettes
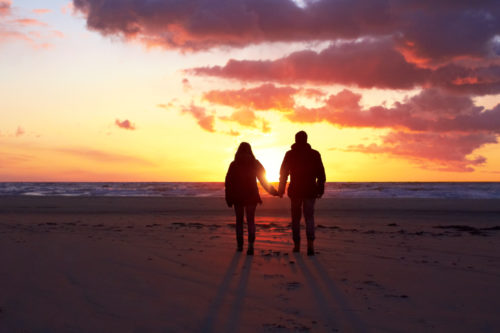
A lot of people confuse shadow photography by capturing silhouettes, but they are two different things. In silhouette photography, your subject is a black shape without any detail against a lighter background. If you find yourself at the beach at dusk, capture your silhouette against the sea. You can also capture the skyline of a city if you’re at a high vantage point during sunset.
Tip – Shoot against the light source, the light should come from behind your subject, and pay attention only to the outline of your subject.
Take Sepia Portraits

While most photographs are timeless, especially if they are the candid kind of friends and family, certain types of pictures simply have more character. And sepia-toned images are precisely that. Warm sepia tones can emphasise on the facial expressions and make for intense and aesthetic photographs. Besides, it adds a vintage vibe or a quaint charm to portraits.
Tip – If capturing a photo in sepia tone is hard because of the high and low contrast, you can edit the picture by adding the sepia effect.
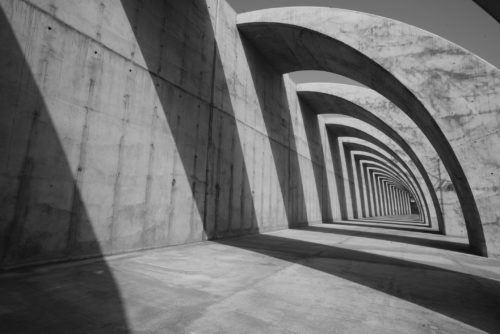
Experiment with Frame in Frames

A cool yet underused photography technique is a frame within a frame, which can add depth and context to your photos. It also draws better attention to the subject. This technique works beautifully for all kinds of pictures; nature, human subjects, monuments etc. For instance; you can use a tree as your first frame and capture the sun through it. You can also capture scenic views through the sunroof of your Ford EcoSport when on a road trip.
Tip – Set the camera to manual mode and take one photo with the subject in focus and one with the frame in focus.
These photography tips are easy and fun to experiment with, and you can start practising these techniques now that you are at home. By the time you head on your next road trip, you’re bound to come back with some stunning pictures!
Subscribe to our newsletter
Subscribe to our newsletter to stay upto date with latest news, offers and much more